Clear Panels
LEXAN® clear hurricane panels offer cost effective hurricane protection for commercial or residential applications. Clear panels are easy to install, allow light into the home and will not warp.
- Meets Class A insurance requirements for lowered premiums
- No sharp edges
- Stores in a fraction of the space required for plywood
- Self-installation options available
Ships anywhere in the U.S.
Wholesale opportunities – contact us to become a dealer
Getting Started
With Tracks
I know the finished panel size
I don’t know the finished panel size
Without Tracks
I know the finished panel size
I don’t know the finished panel size
Palm Coast Shutters offers LEXAN® clear corrugated panels that allow light to enter so you can protect your property without feeling closed in.
This product is so unobtrusive you may leave it in place during the most active part of the hurricane season. Our super lightweight LEXAN® clear panels have no sharp edges, won’t warp and store in a fraction of the space required for plywood.
Make sure your home is properly protected with LEXAN® clear panels from Palm Coast Shutters.
Measuring
FOR PANELS:
- Measure the opening width and height.
- If measuring a door be sure to measure height from the floor to top of opening (for mounting sill to floor).
- If door has steps, measure the height from the top of the step to the top of the opening (for mounting sill to top of front of steps).
- Download Panel Chart to determine finished width of opening & number of panels needed.
- Add 6” to height for window & 3” for Door.
- Standard H – Header top track & studded angle bottom track are included.
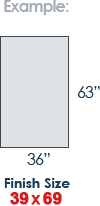
- Place shutter finished size measurements for width and height on order -OR- you may provide your opening dimensions and we will determine your finished shutter size.

Installation
- Locate center of window and mark.
- Locate center of H-Header and mark.
- Pre-drill starter holes in H-Header.
- Pre-drill holes in F-Track.
- Your H-Header comes pre-cut to fit your window.
- Drill the first hole for the H-Header.
- Drill in the first Tapcon screw.
- Level the H-Header and drill the remaining holes.
- Line up the F-Track.
- Drill first hole in the F-Track.
- Drill the first Tapcon in the F-Track.
- Level the F-Track and drill the remaining holes.
- Slide the mounting screws into the F-Track.
- Put the panel in place.
- Wing nut the panels in place.
- The panels will overlap each other across the window.
